Category Archives: Venmo

How to Unfreeze a Frozen Venmo Account

How to Unfreeze a Frozen Venmo Account: Step by Step Guide

Venmo has become a popular platform for peer-to-peer money transfers, allowing users to send and receive funds with ease. However, there are instances where users may find their Venmo accounts frozen, preventing them from accessing their funds or making transactions. This article aims to provide a comprehensive guide on how to unfreeze a frozen Venmo account, offering step-by-step instructions and addressing common concerns.

Reasons for a Frozen Venmo Account: Common Triggers

Before delving into the process of unfreezing a Venmo account, it is crucial to understand the reasons behind this issue. Venmo may freeze an account for various reasons, including suspicious activity, violation of terms of service, or failure to comply with verification requirements. Some common triggers for a frozen Venmo account include:

1. Suspicious or Unusual Activity

Suspicious or Unusual Activity

Venmo monitors accounts for patterns that deviate from normal usage, which might indicate fraudulent activities. Such activities include a sudden increase in transaction amounts, frequent transactions in a short period, or transactions involving new, unverified accounts. If Venmo detects any unusual activity, it may freeze the account to prevent potential fraud.

2. Violation of User Agreement

Venmo has a strict user agreement that all users must follow. This agreement includes guidelines on permissible types of transactions, such as prohibiting the use of Venmo for buying or selling goods and services without a proper business account. Violating these terms can lead to an immediate account freeze.

3. Failed Account Verification

Venmo requires users to complete certain verification steps, particularly when setting transaction limits or adding new payment methods. If the verification fails—due to incorrect information or discrepancies in the provided data—Venmo might freeze the account until the user completes the necessary verification.

4. Chargebacks and Disputes

If a transaction is disputed by another user or a chargeback is filed through a linked credit card, Venmo might freeze the account associated with the transaction. This is a precautionary measure to ensure that funds are not wrongfully withdrawn or misused during the dispute resolution process.

5. Regulatory Compliance

Venmo is required to comply with financial regulations, including those related to anti-money laundering (AML) and combating the financing of terrorism (CFT). If Venmo suspects that an account is being used for illegal purposes, or if it fails to comply with regulatory requirements, the account will be frozen.

6. Overdue Balances

If an account has an overdue balance due to a failed transaction or a reversal of funds, Venmo may freeze the account. Users need to settle these balances promptly to avoid disruptions in their account usage.

7. Security Breaches

If Venmo detects that an account may have been compromised or is at risk of unauthorized access, it will freeze the account for security purposes. This can happen if suspicious login attempts are detected or if there’s a breach related to the user’s connected email or phone number.

Consequences of a Frozen Venmo Account

A frozen Venmo account can lead to various complications, affecting your ability to make transactions, access funds, and manage your financial obligations through the platform. This guide will detail the consequences of having your Venmo account frozen and provide practical steps on how to navigate and mitigate these issues.

1. Inability to Conduct Transactions

Inability to Conduct Transactions

The most immediate and noticeable effect of a frozen account is the inability to send or receive money. This can disrupt your daily financial activities, such as paying bills, splitting costs with friends, or conducting business transactions.

2. Restricted Access to Funds

When Venmo freezes an account, access to any funds currently in the account is also restricted. This means you cannot withdraw, transfer, or use the money in your Venmo balance until the freeze is lifted.

3. Delayed Financial Obligations

For users who rely on Venmo to manage their regular financial obligations, a frozen account can lead to delayed payments. This might result in late fees or service interruptions (e.g., utilities, rent, or subscription services).

4. Impact on Linked Financial Instruments

A frozen account can also affect the linked financial instruments like your bank accounts and credit cards. For example, if Venmo detects a security issue, it might temporarily disable these links to prevent potential fraud.

How to Unfreeze a Frozen Venmo Account: Step by Step Guide

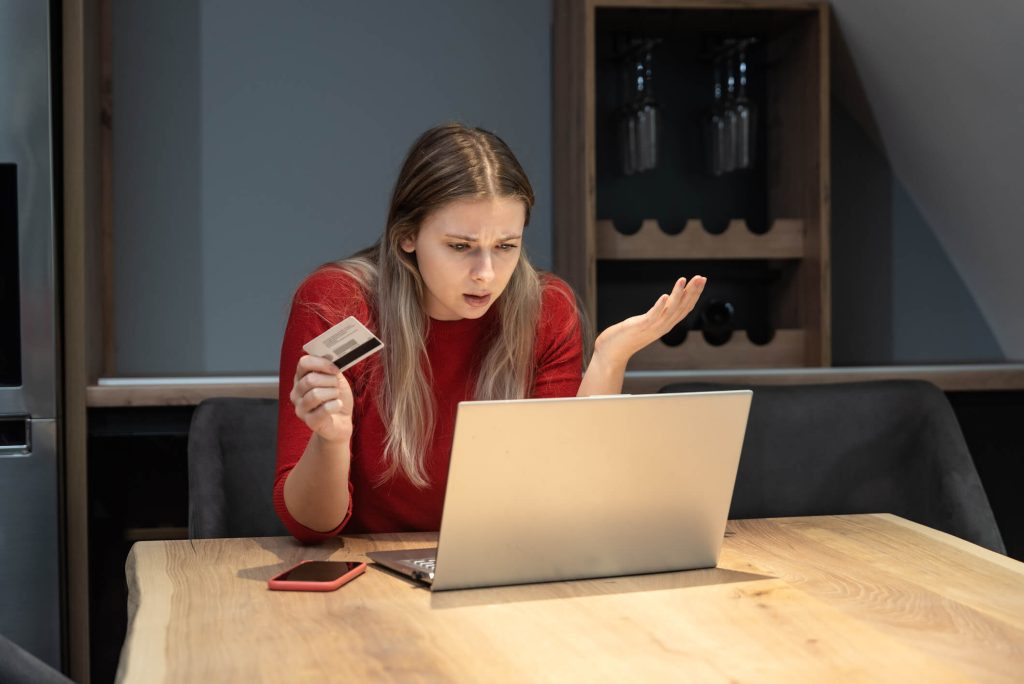
Having your Venmo account frozen can be a distressing experience, especially if you rely on it for daily financial transactions. If you find yourself in this situation, it’s essential to understand the steps you can take to resolve the issue and regain access to your account. This guide provides a clear, step-by-step process to help you unfreeze your Venmo account.

Step 1: Understand the Reason for the Freeze

Before taking any action, it’s crucial to understand why your account was frozen. Venmo typically freezes accounts for the following reasons:

  • Suspicious activities that might suggest unauthorized access or fraudulent transactions.
  • Violation of Venmo’s user agreement, such as using the account for ineligible activities like business transactions without proper authorization.
  • Issues with payment methods, including failed transfers or disputed charges.

Venmo usually sends an email explaining the reason for the freeze. Check your email associated with your Venmo account for this communication. If the reason isn’t clear, you’ll need to contact Venmo directly for more details.

Step 2: Contact Venmo Support

Once you understand the reason behind the account freeze, the next step is to contact Venmo support. You can do this through the following channels:

  • Email: Send a detailed email to Venmo’s customer support, outlining your issue and any steps you have already taken to resolve it.
  • Phone: Venmo provides a customer service phone number which you can call to discuss your account situation directly.
  • In-app: If you can still access the app, use the in-app messaging feature to contact customer service.

When contacting Venmo, be ready to provide any necessary information that can help resolve your account issue. This includes your account details, any relevant transaction IDs, and a clear explanation of your concern.

Step 3: Submit Required Documentation

Depending on the reason for the freeze, Venmo may require additional documentation to verify your identity or validate certain transactions. This could include:

  • Photo ID: A government-issued identification to confirm your identity.
  • Proof of Address: Utility bills or bank statements to verify your address.
  • Transaction Receipts: In cases of disputed transactions, providing receipts or proof of transaction can help resolve misunderstandings quickly.

Make sure to submit clear and legible documents promptly to expedite the unfreezing process.

Step 4: Follow Venmo’s Instructions

After reviewing your case, Venmo will likely provide specific instructions to follow to unfreeze your account. This might include changing your password, setting up two-factor authentication, or resolving any outstanding balances or disputes.

It’s important to follow these instructions carefully and completely, as failure to comply could extend the duration of the freeze or lead to account termination.

Step 5: Wait for the Resolution

Once you have taken the necessary steps and provided all required information, the next step is to wait for Venmo to process your case. The duration of this process can vary based on the complexity of the issue and Venmo’s current workload.

During this time, keep an eye on your email and your Venmo app for any updates or further requests from Venmo. If you don’t hear back within a reasonable time frame, follow up with Venmo support to check on the status of your case.

Step 6: Take Preventative Measures

To prevent future freezes, take proactive steps to secure your account and adhere to Venmo’s policies:

  • Secure your account with a strong password and enable two-factor authentication.
  • Monitor your transactions regularly and report any suspicious activity immediately.
  • Understand and comply with Venmo’s terms of service to avoid violations.

Frequently Asked Questions

Q.1: How long does it take to unfreeze a Venmo account?

The time taken to unfreeze a Venmo account can vary depending on the complexity of the issue. It may take anywhere from a few days to a few weeks for Venmo to resolve the frozen account.

Q.2: Can I still receive funds while my Venmo account is frozen?

No, while your Venmo account is frozen, you will not be able to receive or access any funds. It is crucial to resolve the frozen account issue before attempting any transactions.

Q.3: What happens to my pending transactions during the freeze?

During the freeze, any pending transactions will be put on hold. Once the account is unfrozen, these transactions will be processed accordingly.

Q.4: Can I use an alternative payment method while my Venmo account is frozen?

Yes, users can explore alternative payment methods while their Venmo account is frozen. However, it is important to ensure the security and legitimacy of these alternative methods.

Conclusion

Unfreezing a frozen Venmo account can be a frustrating experience, but by following the steps outlined in this guide, users can increase their chances of successfully resolving the issue. It is crucial to assess the situation, contact Venmo support, provide the required documentation, address any concerns, exercise patience, and follow up with Venmo support. By cooperating with Venmo and maintaining a polite and cooperative approach, users can navigate the unfreezing process effectively and regain access to their funds.

Venmo Payment Declined

Venmo Payment Declined: Why It Happens & How To Handle It

Venmo has become a popular digital payment platform that allows users to send and receive money with ease. However, there may be instances where your Venmo payment gets declined, causing frustration and confusion. In this comprehensive guide, we will delve into the common reasons for Venmo payment declines, how to troubleshoot and resolve these issues, tips to avoid declined payments, and answer frequently asked questions to help you master the art of handling Venmo payment declines.

Common Reasons for Venmo Payment Declined

Experiencing a declined payment on Venmo can be frustrating, especially if you’re unsure of the cause. Here are some of the most common reasons why Venmo payments are declined, along with explanations to help you understand and resolve these issues:

1. Insufficient Funds

Insufficient Funds

One of the most straightforward reasons for a declined Venmo payment is insufficient funds in your linked bank account or Venmo balance. Before making a payment, ensure that your account balance or linked funding source has enough funds to cover the transaction.

2. Bank or Card Declines

Bank or Card Declines

Sometimes, the issue may originate from the bank or card provider linked to your Venmo account. Banks may decline transactions based on suspected fraud, large transaction amounts, or other security precautions. Contact your bank to understand if they are blocking the payment and why.

3. Venmo Account Limits

Venmo Account Limits

Venmo imposes certain limits on transactions, both on the amount you can send and receive. If you exceed these limits, your payment may be declined. Review Venmo’s user agreement or settings to check your personal transaction limits and ensure your payment fits within these parameters.

4. Incorrect Account Details

Entering incorrect payment details, such as the wrong username, phone number, or email, can lead to declined transactions. Double-check the recipient’s details before initiating a payment to ensure all information is correct.

5. Venmo Account Status

If your Venmo account is not in good standing—perhaps due to unresolved issues like negative balances or unverified information—payments can be declined. Ensure your account status is active and in good standing by resolving any pending disputes or account warnings.

6. Suspicious Activity

Venmo’s security measures automatically flag and decline transactions that appear suspicious to prevent fraud. This can happen if there’s an unusual activity like a sudden spike in your transaction volume or large payments to new recipients. If this occurs, Venmo may require you to verify your identity or confirm transaction details.

7. Technical Issues

Occasionally, technical problems with Venmo’s service or network can cause transactions to fail. Check for any announcements from Venmo regarding outages or maintenance that might be affecting services, and try the transaction again once these issues are resolved.

8. Expiry of Linked Payment Methods

A declined payment can occur if your linked credit card or bank account has expired. Check your linked payment methods to ensure they are up-to-date, and update any expired details as necessary.

How to Troubleshoot a Venmo Payment Declined Issue

When you encounter a Venmo payment decline, it can disrupt your transactions and cause inconvenience. However, by following a systematic approach to troubleshooting, you can often resolve the issue quickly. Here’s a step-by-step guide on how to troubleshoot a Venmo payment declined issue:

1. Check Your Venmo Balance

Ensure that your Venmo balance covers the amount of the payment you’re trying to make. If your balance is low, transfer funds from a linked bank account or add money to your Venmo account to cover the transaction.

2. Verify Linked Payment Methods

Check the payment methods linked to your Venmo account. Make sure your credit cards, debit cards, and bank accounts are not expired, blocked, or closed. Update any outdated information and ensure your cards are not maxed out.

3. Look for Alerts or Messages from Venmo

Venmo typically sends an alert or message explaining why a payment was declined. This could be due to transaction limits, suspicious activity, or problems with your payment method. Review any alerts or messages for clues on how to resolve the issue.

4. Confirm the Recipient’s Details

A common mistake is entering incorrect information for the payment recipient. Double-check the recipient’s phone number, email, or username to ensure it’s accurate. A typo or incorrect detail can cause the transaction to fail.

5. Contact Your Bank or Card Issuer

If the payment method is correct but the transaction is still declined, contact your bank or card issuer. Sometimes, banks decline transactions due to suspected fraud or unusual activity. Your bank can provide details on why the transaction was not processed and help you resolve the issue.

6. Check for Venmo Service Issues

Occasionally, Venmo might experience outages or technical difficulties that can affect transactions. Check Venmo’s status page or community forums for any announcements regarding service disruptions. If there are ongoing issues, you may need to wait until they are resolved.

7. Review Venmo’s Transaction Limits

Venmo has specific limits on how much money you can send within a given period. If you’re near or have exceeded your limit, this could be why your payment was declined. Consider sending a smaller amount or waiting until your transaction limit resets.

8. Ensure Compliance with Venmo’s Policies

Make sure your intended use of Venmo complies with their user agreement. Venmo prohibits certain types of transactions, and engaging in these can lead to declined payments or account restrictions.

9. Update Your Venmo App

Running an outdated version of the Venmo app can lead to performance issues, including payment problems. Check your app store for any updates to the Venmo app and install them. An updated app can fix bugs and enhance overall functionality.

10. Contact Venmo Support

If you’ve tried all the above steps and still face issues, contact Venmo support for assistance. Be ready to provide details about your account, the transaction attempt, and any error messages you received. Venmo support can provide more specific guidance based on your account activity and the nature of the issue.

Step-by-Step Guide: Resolving Venmo Payment Declined Errors

Dealing with a declined Venmo payment can be frustrating, but understanding the steps to resolve the issue can help alleviate some of that stress. Follow this detailed step-by-step guide to address and resolve common errors that lead to Venmo payment declines.

Step 1: Check Your Account Balance

First, verify that you have sufficient funds in your Venmo balance or linked bank account to cover the transaction. If your balance is too low, this could be the immediate cause of the decline.

Step 2: Inspect Linked Payment Methods

Ensure that all payment methods linked to your Venmo account are up-to-date and valid. This includes checking that your bank accounts or cards have not expired, been canceled, or are over their limit. Updating expired cards or linking a new payment method may quickly resolve the payment issue.

Step 3: Review Venmo Alerts

Venmo typically notifies users of the specific reason behind a payment decline through an alert or notification within the app. Check for any messages from Venmo that might explain why your payment was declined. This information can direct your next steps more efficiently.

Step 4: Confirm Recipient Details

Errors in entering the recipient’s Venmo username, phone number, or email address can lead to transaction failures. Double-check the recipient’s details to ensure they are correct and that you are sending money to the right person.

Step 5: Contact Your Bank or Card Issuer

If everything appears correct on your end, but payments continue to be declined, there may be an issue with your bank or card issuer. Sometimes, banks put security holds on transactions they flag as unusual. Contacting your bank can clarify if they are blocking the transaction and why.

Step 6: Evaluate Venmo’s Sending Limits

Be aware of your sending limits on Venmo. If your transaction exceeds the allowed amount, Venmo will decline the payment. You can check your limits in the app’s settings and either increase your limits by verifying your identity, if not already done, or reduce the transaction amount.

Step 7: Ensure Compliance with Venmo Policies

Venmo has strict guidelines on the types of transactions allowed. Ensure that your transaction does not violate Venmo’s user policies. Transactions that involve forbidden activities can be declined.

Step 8: Check for App Updates

Sometimes, an outdated version of the Venmo app can cause issues with transactions. Ensure your app is updated to the latest version available in the App Store or Google Play. Updates often fix bugs and improve security, possibly resolving underlying issues causing payment declines.

Step 9: Retry the Transaction

If you’ve addressed potential issues and everything checks out, try sending the payment again. Temporary glitches or connectivity issues can sometimes cause transactions to fail.

Step 10: Reach Out to Venmo Support

If you have tried all the above steps and your payment is still being declined, it’s time to contact Venmo support. Provide them with details about the transaction, including what steps you have already taken to resolve the issue. Venmo support can provide further insights and assist in resolving the problem.

Tips to Avoid Venmo Payment Declined Situations

Navigating Venmo without encountering payment declines is essential for smooth and efficient transactions. Here are several proactive tips to help you avoid situations where your Venmo payment may be declined:

1. Maintain a Sufficient Balance

Ensure that your Venmo balance or the balance in your linked bank account or credit card is sufficient to cover your transactions. Regularly check your balances before making payments to avoid declines due to insufficient funds.

2. Verify Linked Accounts and Cards

Periodically review and update your linked bank accounts and cards. Make sure that the details are current and that the accounts are active. Expired cards or closed accounts are common reasons for payment declines.

3. Know Your Transaction Limits

Be aware of the sending, receiving, and withdrawal limits on your Venmo account. Venmo imposes limits that can vary based on whether your identity has been verified. Ensure you understand these limits to prevent declines from exceeding them.

4. Keep Your App Updated

Using the latest version of the Venmo app can prevent many technical issues associated with payment processing. App updates often include bug fixes, security enhancements, and new features that can improve transaction success rates.

5. Double-Check Recipient Information

Before sending a payment, double-check the recipient’s username, phone number, or email address. Errors in entering recipient information are a frequent cause of payment declines. Ensure you have the correct details.

6. Regularly Monitor Your Transactions

Keep an eye on your transaction history for any unusual activity. Monitoring your transactions can help you spot and address issues early, such as unauthorized transactions that could lead to account freezes or additional scrutiny from Venmo.

7. Educate Yourself on Venmo’s Policies

Understanding the rules and regulations of Venmo, including what types of transactions are allowed, can help you avoid declines related to policy violations. Familiarize yourself with Venmo’s user agreement and adhere to the accepted usage guidelines.

8. Opt for Notifications

Enable notifications in your Venmo settings to receive alerts about your account activity, including balance updates and transaction status. This will help you stay informed and quickly address any issues that could lead to declines.

9. Communicate with Your Bank

Some banks may block transactions they deem suspicious, including frequent or large transfers via Venmo. Inform your bank of your Venmo use if necessary, especially when planning larger transactions, to prevent these from being flagged as fraudulent.

10. Use Reliable Internet Connections

A stable and secure internet connection can prevent interruptions during the transaction process that might lead to a decline. Avoid making transactions on public or unsecured Wi-Fi networks.

11. Contact Venmo Support for Clarification

If you’re unsure why a transaction was declined, or if you notice a pattern of declines, contact Venmo support for assistance. They can provide specific insights based on your account activity and help you take appropriate measures to prevent future issues.

Frequently Asked Questions

Q.1: What should I do if my Venmo payment is declined?

If your Venmo payment is declined, start by checking your account balance to ensure sufficient funds. Verify the payment details for accuracy. If the issue persists, contact Venmo’s customer support for assistance.

Q.2: Can I reverse a declined Venmo payment?

No, you cannot reverse a declined Venmo payment. The funds will not be deducted from your account, and the recipient will not receive the payment. You will need to resolve the issue and initiate the payment again.

Q.3: How long does it take to resolve a Venmo payment declined issue?

The time taken to resolve a Venmo payment declined issue can vary depending on the specific circumstances. In some cases, it may be resolved within a few hours, while in others, it may take a few days. Contact Venmo’s customer support for an estimate of the resolution time.

Conclusion

Handling a Venmo payment declined issue can be frustrating, but with the right knowledge and steps, you can overcome these challenges. Understanding the common reasons for payment declines, troubleshooting techniques, and tips to avoid such situations can help you navigate the Venmo platform smoothly. Remember to maintain sufficient funds, verify payment details, and keep your account secure. In case of any issues, reach out to Venmo’s customer support for assistance. By following these guidelines, you can master the art of handling Venmo payment declines and enjoy seamless digital transactions.